
3D Worlds
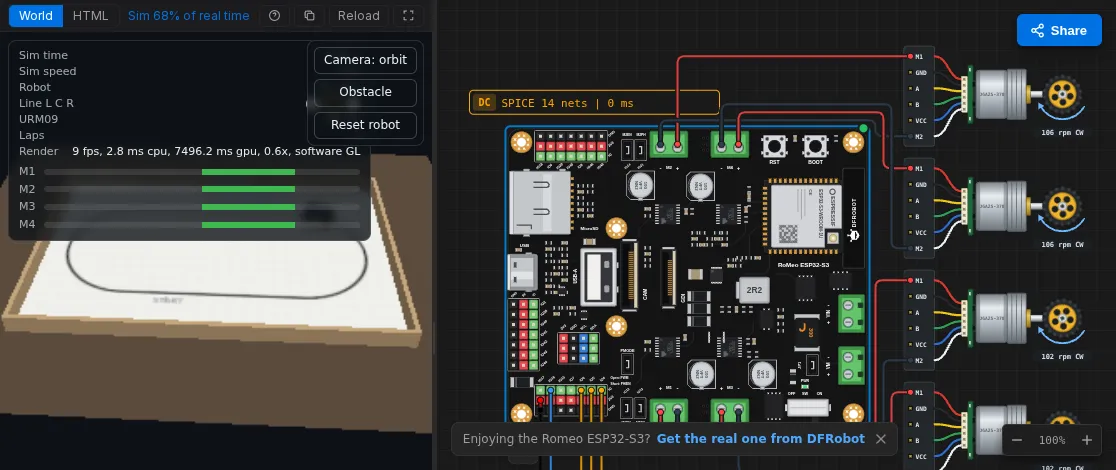
A World puts your circuit in a physical scene. The firmware runs on the emulated board exactly as it would on the real one: the motors it drives move a robot, the servos it sets turn an arm or a sensor, and the line, distance and motion sensors read what is under and in front of the robot. The same code then runs on the real hardware.
Open the World
Section titled “Open the World”Every project with a board has a 3D button in the canvas header, next to the board selector:
The first time, it opens an introduction with three ways in:
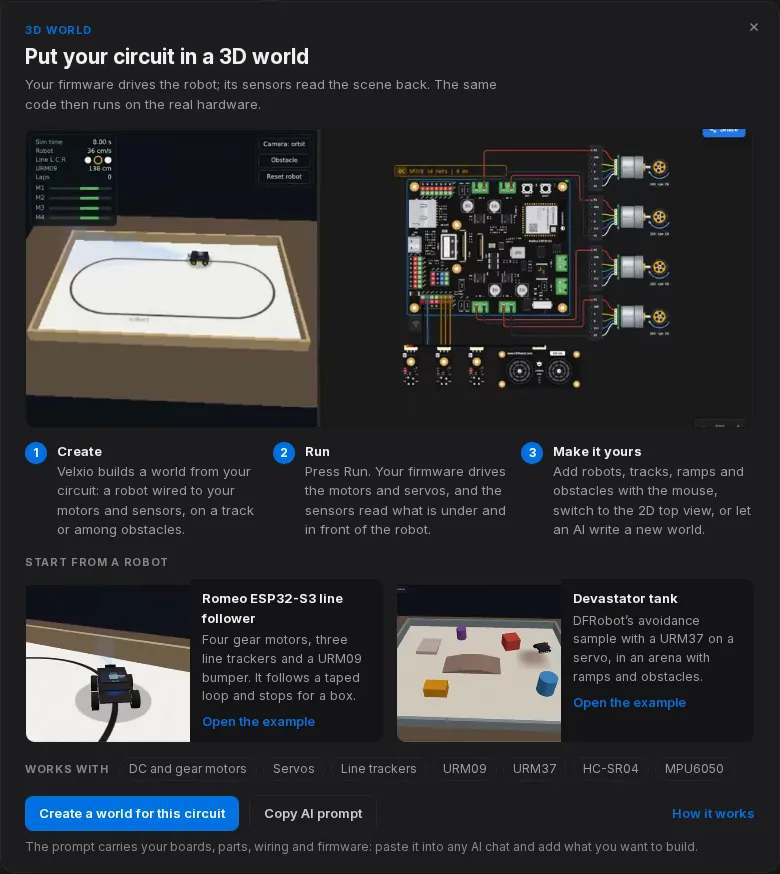
- Start from a robot: open a complete robot project (board, wired motors and sensors, firmware and World) and press Run. There are five: the Romeo ESP32-S3 line follower, the Devastator tank, an Arduino Uno line follower with an L293D, an ESP32 obstacle avoider with an HC-SR04, and an ESP32 robot arm whose four servos follow four knobs.
- Create a world for this circuit: Velxio builds a starting scene from what is on your canvas. Motors become a robot (two or four wheels), line sensors get a taped track under them, a distance sensor gets obstacles in front of it, and servos alone become a robot arm on a small table.
- Copy AI prompt: copies a brief with your boards, parts, wiring and firmware for ChatGPT, Claude or Gemini, so an AI can write any World you describe. See Write your own World.
Once the project has a World, the 3D button switches between the World and your code.
Press Run
Section titled “Press Run”When the simulation starts, the editor area shows the World and the canvas stays next to it, so you can watch the motors turn on the circuit while the robot drives. The loop closes about 125 times per second:
- The firmware sets pins: a direction and a PWM duty for each motor, a pulse for each servo.
- Velxio reads each motor’s drive (through whatever driver the circuit uses) and each servo’s angle, and sends them to the World.
- The World moves the robot and measures the scene: the tape under each line sensor, the nearest obstacle in front of each distance sensor, the robot’s acceleration and turn rate for an IMU.
- Velxio writes those readings into the sensor parts, and the firmware reads
them on its next
digitalRead(),pulseIn()or I2C transfer.
The World runs on the board’s simulated clock, not on wall time. If your
computer runs the simulation at half speed, the robot moves at half speed too,
and it still agrees with the firmware’s millis().
The World bar
Section titled “The World bar”| Control | What it does |
|---|---|
| World / HTML | Show the scene, or the world.html source behind it. |
| Guide | A short explanation of the World, over the scene. |
| Copy AI prompt | Copy the brief for an outside AI chat (see Write your own World). |
| Reload | Restart the World from its file. |
| Full screen | Show only the World. Press Esc to come back. |
Worlds made with Velxio’s scene kit add their own toolbar inside the scene: Edit, Add, 3D / 2D, Camera (orbit, follow the robot, from above) and Reset (put the robots back at their start). See Build a scene.
3D or 2D
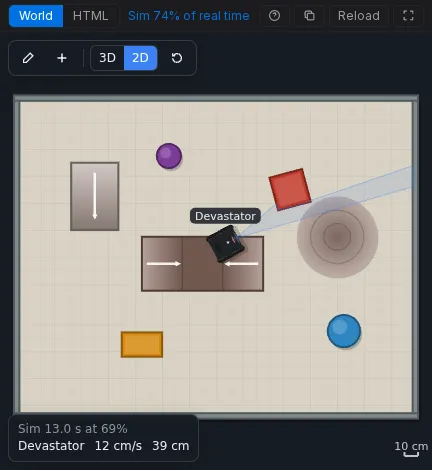
Section titled “3D or 2D”The 3D view needs WebGL. The 2D top view draws the same scene and runs the same physics with no graphics card, so it works on any school computer, and it is the fallback when 3D is not available.
What a World works with
Section titled “What a World works with”- Reads: DC motors and gear motors (behind an L293D, a transistor or MOSFET, a board’s onboard driver, or straight on a pin), servos and LEDs.
- Feeds: the DFRobot Gravity line tracker, the URM09 and URM37 ultrasonic sensors, the HC-SR04 and the MPU6050 IMU.
Every other part (displays, buzzers, RGB LEDs) keeps working on the canvas. Details and firmware recipes: Motors and sensors.
It is a file
Section titled “It is a file”A World is one file, world.html, in the board’s file group next to the
sketch. It is saved, shared and exported with the project, and it never goes
to the board: it is not compiled, not written to flash and not copied to the
microSD card. Delete the file and the project has no World.