
Raspberry Pi (Linux)
The Raspberry Pi family runs Python scripts against the circuit on the canvas. Unlike the microcontroller boards there is nothing to compile: you write a script, press Run, and Velxio picks one of two engines to execute it. Neither engine is a Raspberry Pi OS desktop, so read this page before assuming a tutorial written for real hardware will work unchanged. Most of them do: the tables below were measured against the live product, part by part, on 2026-09-19 and 2026-09-20.
| Board | CPU profile |
|---|---|
| Raspberry Pi Zero / 1 / 2 | ARM Cortex-A7 class |
| Raspberry Pi 3 | Cortex-A53 |
| Raspberry Pi 4 | Cortex-A72 |
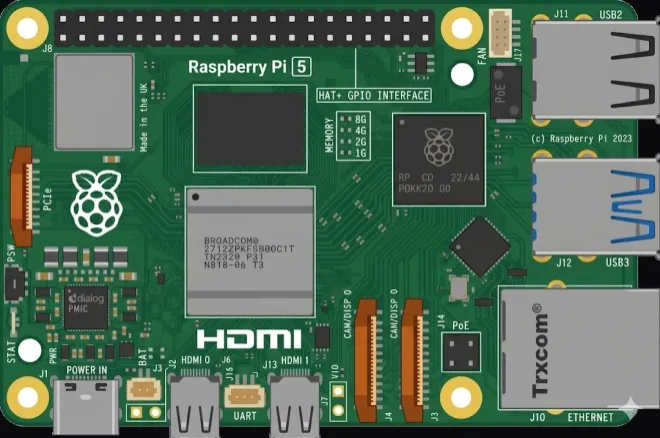
| Raspberry Pi 5 | Cortex-A76 |
Anyone can place a Pi on the canvas and wire a circuit around it. Running
it needs a paid plan, or one of the three free trial sessions of 15
minutes every signed-in account gets for the Pi family (see
plans). A project that has nothing a Pi can
run, such as an Arduino .ino sketch on a Pi board, is told so before a trial
session is spent on it.
Two engines
Section titled “Two engines”Instant (in your browser)
Section titled “Instant (in your browser)”The default. Your script runs on a Python interpreter compiled to
WebAssembly inside the tab, starts in a few seconds, and needs nothing
from Velxio’s servers. Pin writes reach the canvas directly, so an LED
lights the moment led.on() runs. I2C, SPI and 1-Wire are there as the
device files a Pi has (/dev/i2c-1, /dev/spidev0.0, the
/sys/bus/w1/devices tree), answered by the parts wired on the canvas, so
the real smbus2, w1thermsensor and Adafruit Blinka run unmodified.
It is a plain interpreter, not an operating system: there is no shell, no
subprocess, no raw sockets. A script that asks for one of those is sent
to the Linux engine instead; the engine chip in the toolbar says which
engine will run and, when it is Linux, the file and line that asked for it.
Linux (on Velxio’s servers)
Section titled “Linux (on Velxio’s servers)”A real Linux guest booted in QEMU (-M virt, with the CPU profile of your
board) that you reach through the serial console in the workspace. Be
precise about what it is:
- Alpine Linux, not Raspberry Pi OS.
python3andpipare installed;apt,raspi-config, the desktop and the Pi firmware tools are not there. - No network from inside the guest, on purpose. Nothing in there can
reach PyPI; the packages a project declares in
requirements.txtare importable the moment the guest boots, andpipitself works offline against a local wheelhouse (below). - The header buses are real device files.
/dev/i2c-0,/dev/i2c-1,/dev/spidev0.0and/dev/spidev0.1answer the same system calls they do on a Pi, so a library that opens them itself (Adafruit Blinka), a C program, or your ownioctlcode talks to the parts on the canvas. An address nobody holds fails withOSError: [Errno 121] Remote I/O error, as on hardware. smbus2andspidevare the upstream packages, not Velxio stand-ins:import smbus2gives you the real smbus2,import spideva compiled py-spidev, and both go through those device nodes. So the kernel’s rules apply as they do on a board. An SMBus block transfer longer than 32 bytes fails with an error instead of being quietly shortened, and opening a bus that does not exist,SMBus(2)for instance, raises at the open call rather than at the first read.- The header UART is a real serial port.
/dev/serial0(also/dev/ttyAMA0and/dev/ttyS0) is a genuine tty driven by the unmodified pyserial:serial.tools.list_ports,select()on the port andcat /dev/serial0all work, and the bytes go to whatever is wired to GPIO14 and GPIO15 on the canvas. - 1-Wire is there as the sysfs tree a Pi has. A DS18B20 on GPIO4 shows up
under
/sys/bus/w1/devices/28-*/withw1_slaveandtemperature, socat,w1thermsensor-style readers and your own code work (dtoverlay=w1-gpio,gpiopin=Nin aconfig.txtof the project moves the pin). libcamera-jpeg,rpicam-jpeg,rpicam-stillandlibcamera-stilltake a still from the camera part on the canvas, the way a script calls them withsubprocess. The picture is the part’s test pattern unless you allow the guest to use your webcam, which Velxio asks for the first time a program takes a still (see below).- GPIO has a real character device.
/dev/gpiochip0is there, and so is the deprecated/sys/class/gpio, on top ofRPi.GPIOandgpiozero. There is still no/dev/gpiomem, sopigpio, which wants the peripheral registers, has nothing to talk to (see below). - Booting takes roughly 20 to 30 seconds, longer when the server is busy; a “Booting” overlay tracks it. A guest session ends after 2 hours at the latest.
- The guest runs
script.pyfrom your project when it boots. Name your main file that way in Linux mode (the instant engine runs the first.pyit finds).
The Linux terminal button in the workspace pins this engine for the rest of the session when you want the shell, for example to inspect files or run a script by hand. The choice is not saved with the project: reopen it tomorrow and Run goes back to the detector’s answer. Everything the instant engine can run is faster without it.
GPIO in the Linux engine: gpiochip0 and libgpiod
Section titled “GPIO in the Linux engine: gpiochip0 and libgpiod”The guest registers a GPIO character device with the Pi’s own identity,
so the modern stack that Bookworm and the Pi 5 documentation teach works
here. gpiodetect answers:
gpiochip0 [pinctrl-bcm2835] (54 lines)The tools are installed (gpiodetect, gpioinfo, gpioget, gpioset,
gpiomon), and a line they drive reaches the part wired to that pin on
the canvas.
The image ships libgpiod version 1, so write the commands the version
1 way: the chip is a positional argument, not a --chip option.
gpioset gpiochip0 17=1 # drive GPIO17 highgpioget gpiochip0 5 # read GPIO5, prints 0 or 1gpiomon gpiochip0 5 # print edges on GPIO5 as they arriveThe version 2 spelling (gpioset --chip gpiochip0 17=1) is not
understood. If a tutorial uses it, drop the option and pass the chip on
its own.
The Python bindings are preinstalled as well, again with the version 1 API:
import gpiod
chip = gpiod.Chip("gpiochip0")line = chip.get_line(17)line.request(consumer="velxio", type=gpiod.LINE_REQ_DIR_OUT)line.set_value(1)
RPi.GPIO and gpiozero are untouched by this and still the shortest way
to write a script. The deprecated sysfs interface under /sys/class/gpio
works too, so an old tutorial that exports a pin by writing to files does
what it says. What is still absent is /dev/gpiomem, and with it
pigpio: that library maps the peripheral registers directly, and there
is nothing here to map.
The instant engine has no character device: in your browser, GPIO is
RPi.GPIO, gpiozero or Blinka.
The camera in the Linux engine
Section titled “The camera in the Linux engine”By default the guest’s camera tools return the camera part’s test pattern, and a script that takes a still gets a picture without anyone being asked anything.
The first time a program asks for a still in the Linux engine with the camera part in webcam mode, Velxio asks whether it may use your real webcam for it. It has to ask because of where the code runs: in the instant engine the frames never leave your machine, while the Linux guest runs on Velxio’s servers, so allowing it means the frames are sent there.
- Say no and the tools keep returning the test pattern. Nothing breaks and no script has to change.
- Say yes and the stills are your real webcam, for that page session only. The answer is not saved in the project and not remembered after a reload, so the next time you open the page you are asked again.
picamera2 is a different matter: it is still an instant-engine module.
In the Linux guest, take stills with the command-line tools.
What works, part by part
Section titled “What works, part by part”Each row is one script written the way a Pi tutorial writes it, run through the live product with the part wired on the canvas, on a Raspberry Pi 4. The display rows are checked on the canvas itself: the panel has to light, not only the script to finish.
| What | Library the script uses | Instant | Linux |
|---|---|---|---|
| LED and push button | gpiozero |
Yes | Yes |
| LED from the shell | gpioset (libgpiod 1) |
No | Yes |
| Servo (PWM) | gpiozero.Servo |
Yes | Yes |
| MPU6050 accelerometer | smbus2 |
Yes | Yes |
| DS3231 real-time clock | smbus2 |
Yes | Yes |
| BMP280 pressure sensor | smbus2 |
Yes | Yes |
| SHT31 temperature and humidity | smbus2 |
Yes | Yes |
| PCA9685 16-channel PWM driver | smbus2 |
Yes | Yes |
| ADS1115 ADC | smbus2 |
Yes | Yes |
| 16x2 LCD, I2C backpack | smbus2 or RPLCD.i2c |
Yes | Yes |
| 16x2 LCD, parallel (RS, E, D4 to D7) | RPLCD.gpio |
Yes | Yes |
| SSD1306 OLED | smbus2 |
Yes | Yes |
| SSD1306 OLED | luma.oled |
Yes | Yes |
| SSD1306 OLED | Adafruit Blinka + adafruit_ssd1306 |
Yes | Yes |
| ILI9341 TFT | spidev |
Yes | Yes |
| microSD card (SPI mode) | spidev |
Yes | Yes |
| DS18B20 temperature probe | 1-Wire sysfs, w1thermsensor |
Yes | Yes |
| GPS module on the header UART | pyserial on /dev/serial0 |
Yes | Yes |
| 7.5” e-paper (UC8179) | spidev + RPi.GPIO, Waveshare-style driver |
Yes | Yes |
| Potentiometer straight on a GPIO | No (see below) | No |
The OLED and LCD rows were also run on a Raspberry Pi Zero in the Linux engine, which is a 32-bit guest with its own image.
What does not work
Section titled “What does not work”- Analog input on a GPIO. A Raspberry Pi has no ADC, on real hardware too. A potentiometer, LDR or pulse sensor wired straight to a GPIO only ever reads high or low, and the run console says so. Put an ADS1115 (I2C) or an MCP3008 (SPI) between the sensor and the Pi, exactly as you would on a bench; both are in the catalog, and the gallery has an MCP3008 example with a potentiometer.
picamera2in the Linux engine. It uses your webcam in the instant engine, because the script runs in your browser. In the guest, stills come fromrpicam-jpegand its siblings instead, over the test pattern or over your webcam once you have allowed it (above).- An e-paper driver that sends its picture to the wrong place. On a
UC8179 panel (the 7.5”) command
0x10is the previous image and0x13is the one the glass shows. A driver that writes0x10only gets a blank refresh here, exactly as on the real panel, and the serial monitor (the Linux terminal, in that engine) says why. The BUSY pin follows the controller too: LOW while an UltraChip panel works, HIGH on an SSD168x. pigpioand/dev/gpiomem.pigpioreaches the pins by mapping the peripheral registers, and neither engine gives it that mapping. UseRPi.GPIO,gpiozeroor, in the Linux engine,libgpiod(above).libgpiod/gpiodin the instant engine. The character device is a Linux-engine thing; in the browser there is no/dev/gpiochip0to open.- A script copied from a MicroPython tutorial.
import machine,from gpio_lcd import GpioLcdand friends exist on a Pico or an ESP32, not on a board that runs the full Python. The console names the Pi equivalent (gpiozero,RPLCD,luma.oled,w1thermsensor) instead of proposing a package to install. - PyTorch, TensorFlow. Gigabytes, and nothing here to accelerate them. They are refused with that explanation.
Python modules in each engine
Section titled “Python modules in each engine”Both engines ship the standard library. “Preinstalled” means it works from
the import line alone, with no requirements.txt, the way Raspberry Pi OS
has its hardware libraries in the image.
| Module | Instant (browser) | Linux (guest) |
|---|---|---|
RPi.GPIO |
Preinstalled | Preinstalled |
gpiozero |
Preinstalled | Preinstalled (2.0.1) |
gpiod (libgpiod 1) |
No character device in the browser | Preinstalled, with the gpio* tools |
smbus2 / smbus |
Preinstalled (the real library) | Preinstalled (the real library) |
spidev |
Preinstalled | Preinstalled (a compiled py-spidev) |
serial (pyserial) |
The Pi UART paths only | The real pyserial 3.5 on a real tty |
w1thermsensor |
Preinstalled | Through requirements.txt (the 1-Wire tree is there) |
luma.core, luma.oled, luma.lcd |
Preinstalled | Preinstalled |
RPLCD |
Preinstalled | Preinstalled |
ST7789 |
Preinstalled | Preinstalled |
board, busio, digitalio (Adafruit Blinka) |
Preinstalled | Preinstalled |
adafruit_ssd1306, adafruit_rgb_display |
Preinstalled | Preinstalled |
PIL (Pillow), numpy |
Preinstalled | Preinstalled (Pillow 10.3, numpy 1.25) |
cv2 (OpenCV) |
Yes | No (no build for the guest) |
picamera2 |
Yes, over your webcam | No (use rpicam-jpeg / libcamera-jpeg) |
velxio_screen |
Yes | Yes |
requests / urllib |
Yes, through Velxio’s egress proxy with an allowlist | No network |
| Anything else | Through requirements.txt |
Through requirements.txt |
The DejaVu fonts are in the guest at the path Raspberry Pi OS uses
(/usr/share/fonts/truetype/dejavu/DejaVuSans.ttf), because display
tutorials hard-code it.
from luma.core.interface.serial import i2cfrom luma.core.render import canvasfrom luma.oled.device import ssd1306
import time
device = ssd1306(i2c(port=1, address=0x3C))with canvas(device) as draw:    draw.text((10, 20), "Hello from a Pi", fill="white")
# luma clears the panel when the script ends, as it does on hardware,# so keep the script alive for as long as the text should stay up.while True:    time.sleep(1)
Other third-party packages need a requirements.txt
Section titled “Other third-party packages need a requirements.txt”Add a requirements.txt file next to your script, one package per line;
Velxio resolves it before the run and tells you, in the run console, what it
installed. When a script imports a package that is missing, the console
offers the line to add and a button writes it for you. Which engine can take
a package depends on how it is built:
- A pure-Python package (a
py3-none-anywheel) runs in both engines. - A package with compiled code runs in the instant engine when the
browser runtime ships it (numpy, pillow, opencv-python, scikit-learn among
others), and in the Linux engine only if PyPI has a musl aarch64
wheel for it (numpy, pandas, scipy and psutil do). Packages that only
publish glibc
manylinuxwheels cannot be installed in the guest. - On a Raspberry Pi Zero, 1 or 2 the guest is 32-bit, and PyPI has almost no compiled wheels for it: there, stay with what is preinstalled or with pure-Python packages.
- Names the guest already provides (
RPi.GPIO,smbus2,spidev,pyserial,gpiozero,gpiod) are never downloaded, so a tutorial’srequirements.txtthat lists them does no harm.
Wheels count against the same storage quota as Arduino libraries.
Running pip by hand in the Linux guest
Section titled “Running pip by hand in the Linux guest”You never have to. What requirements.txt declares is importable the
moment the guest boots, with no install step at all. The real command
works too, for someone following a tutorial that spells it out:
python3 -m venv --system-site-packages ~/.venv~/.venv/bin/pip install -r requirements.txtThe guest has no network, so pip resolves against a local wheelhouse
that ships with the project’s packages; it installs what the project
declares, and cannot reach PyPI for anything else.
Know what it costs before you start, and do not read the silence as a hang: on the emulated CPU, creating a virtualenv with pip takes about four minutes (about six seconds without it), and the install itself about half a minute. The wait buys you nothing you did not already have, since the packages you declared are already imported by the time you get a prompt. It is there for the times you want the real workflow.
The system Python is marked externally managed (PEP 668), exactly as on
Raspberry Pi OS Bookworm, so a bare pip install outside a virtualenv
refuses with the same message it gives on the board.
A file panel in the Pi workspace uploads scripts and data files into
the project; in Linux mode they are copied into the guest’s home directory
before script.py starts.
The UNIHIKER M10
Section titled “The UNIHIKER M10”DFRobot’s education SBC (a Linux board with a built-in touchscreen) runs
on the same two engines, with its own pinpong and unihiker modules in
place of the Pi libraries. It is a paid board with its own three trial
sessions; find it in the picker next to the Pi family.
Board art and pinouts
Section titled “Board art and pinouts”Each board’s canvas art and full pin map, generated from the simulator:
Raspberry Pi 3 (art also for Zero/1/2) · Raspberry Pi 4 · Raspberry Pi 5 · UNIHIKER M10