Every October the same handful of builds comes back on Hackster, Instructables and the element14 Halloween hackathon: a skull with a servo jaw that screams when someone walks past, a pair of eyes on round displays that follow you, a painting that reacts when you get close, a pumpkin full of NeoPixels and a candy bowl that only gives sweets if you hold out your hand.
We rebuilt seven of them as examples in the Velxio gallery, one per board family, using Arduino parts and the modules of our partners Seeed Studio, DFRobot, M5Stack and Pimoroni. Each one opens in the editor with the circuit already wired and the sketch already written. Press Run and it compiles and starts in the browser, so you can tune the timing, the colours and the thresholds before you cut a single wire.
| Project | Board | Main parts | Open it |
|---|---|---|---|
| Jump-scare skull | Arduino Uno | PIR, servo, 2 LEDs, buzzer | halloween-uno-jump-scare-skull |
| Candy dispenser | Arduino Uno | HC-SR04, servo, SSD1306 OLED, buzzer | halloween-uno-candy-dispenser |
| The eye that follows you | Seeed XIAO ESP32-S3 | Seeed Round Display (GC9A01 + touch) | halloween-round-display-eye |
| Grove jack-o’-lantern | Seeed XIAO ESP32-S3 | Grove RGB LED Ring, Light Sensor, PIR, Passive Buzzer | halloween-grove-pumpkin-ring |
| Haunted portrait | ESP32 DevKit | DFRobot C4001 mmWave radar, 2 LEDs, buzzer | halloween-c4001-haunted-portrait |
| Ghost detector | M5Stack Core | built-in LCD, buttons and speaker | halloween-m5stack-ghost-detector |
| LED-matrix pumpkin | Pimoroni Stellar Unicorn | 16x16 RGB matrix, buttons | halloween-stellar-unicorn-pumpkin |
Searching for halloween on the examples page
lists all seven.
The photo at the top of five of the sections is an illustration of how the finished prop could look, generated with AI. Every other picture in this article is a capture of the example running in Velxio.
How to open and run any of them
- Click the project link in the table. The editor opens with the board, the parts, the wires and the sketch in place.
- Press the green Run button in the toolbar. The sketch compiles on our servers (the first build of a board can take a minute) and then runs in your browser.
- Open the Serial Monitor at the bottom. Every sketch prints what it is doing, so you can see the props react even with the sound off.
- Click a sensor on the canvas while the simulation runs to open its panel. That is where the distance, light and presence sliders live.
1. Jump-scare skull (Arduino Uno)
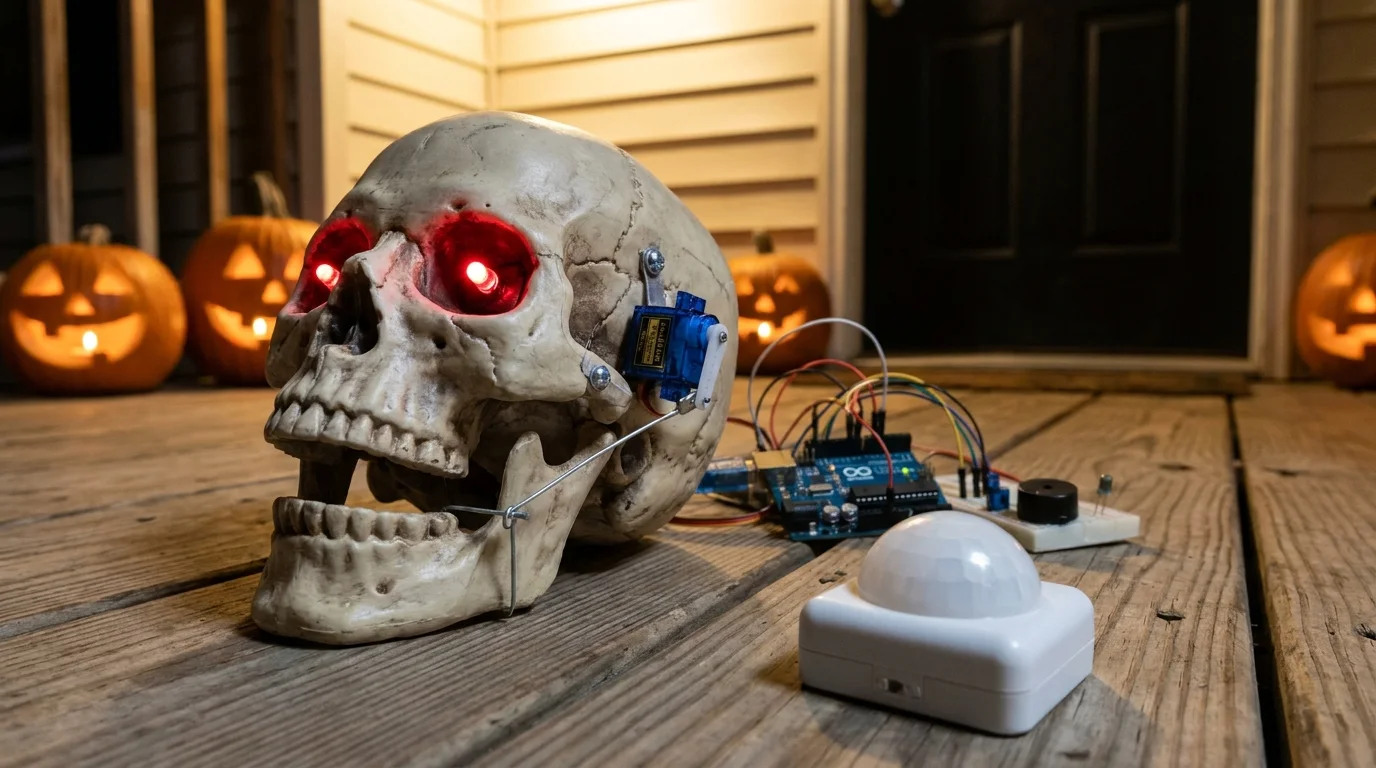
Illustration of the finished prop, generated with AI. The circuit below is the one that runs in Velxio.
The classic porch prop. A PIR motion sensor on D2 watches the doorway. When someone walks past, two red LED eyes on D5 and D6 flare to full brightness, a servo on D9 makes the jaw chatter four times and a buzzer on D8 screams with a siren that slides from 1.8 kHz down to a growl. Between visitors the eyes smoulder like embers, and a four second cooldown stops the skull scaring the same person twice in a row.
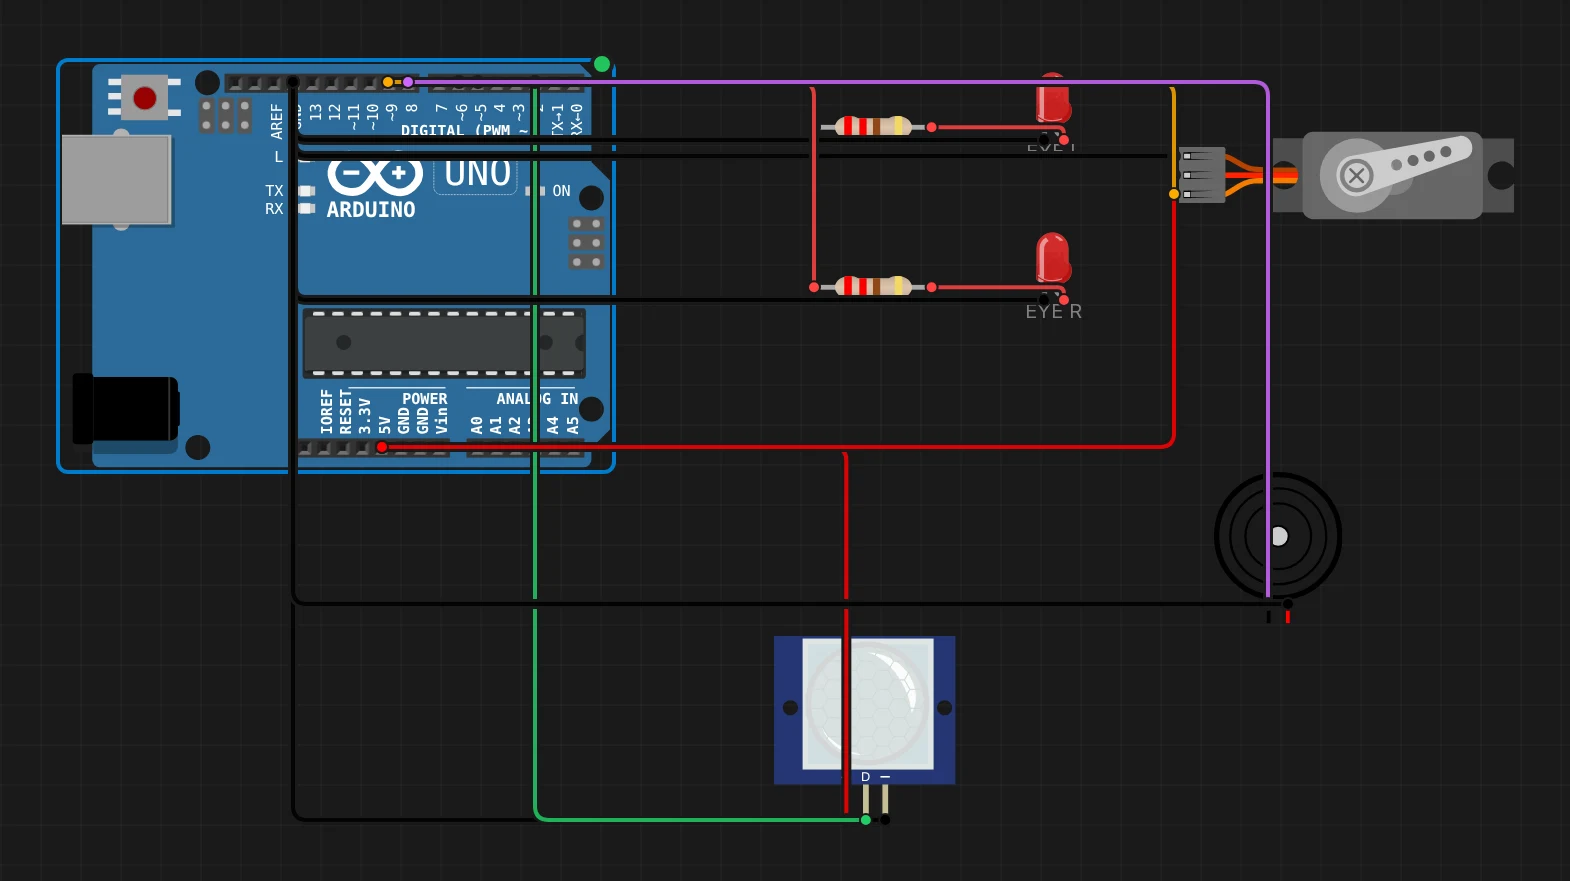
To try it, click the PIR sensor on the canvas. The output goes HIGH for three seconds, which is what a real HC-SR501 does with its delay pot turned all the way down.
The whole scare is a short function. Note that tone() on the Uno uses
Timer2 and the Servo library uses Timer1, so the scream and the jaw never
fight over a timer:
void scare() {
  eyes(255);
  for (int i = 0; i < 4; i++) {          // the jaw chatters four times
    jaw.write(JAW_OPEN);
    if (i == 0) scream(); else delay(160);
    jaw.write(JAW_CLOSED);
    delay(140);
  }
  eyes(40);
  lastScare = millis();
}
2. Trick-or-treat candy dispenser (Arduino Uno)

Illustration of the finished prop, generated with AI. The circuit below is the one that runs in Velxio.
A touch-free candy bowl. An HC-SR04 ultrasonic sensor points up from under the chute and looks for a hand closer than 10 cm. When it finds one, a servo opens the gate, drops one candy and closes it again, the buzzer plays a short jingle and an SSD1306 OLED counts down what is left, with a small jack-o’-lantern drawn in the corner. When the stock runs out the screen says TRICK and the buzzer laughs at you instead.
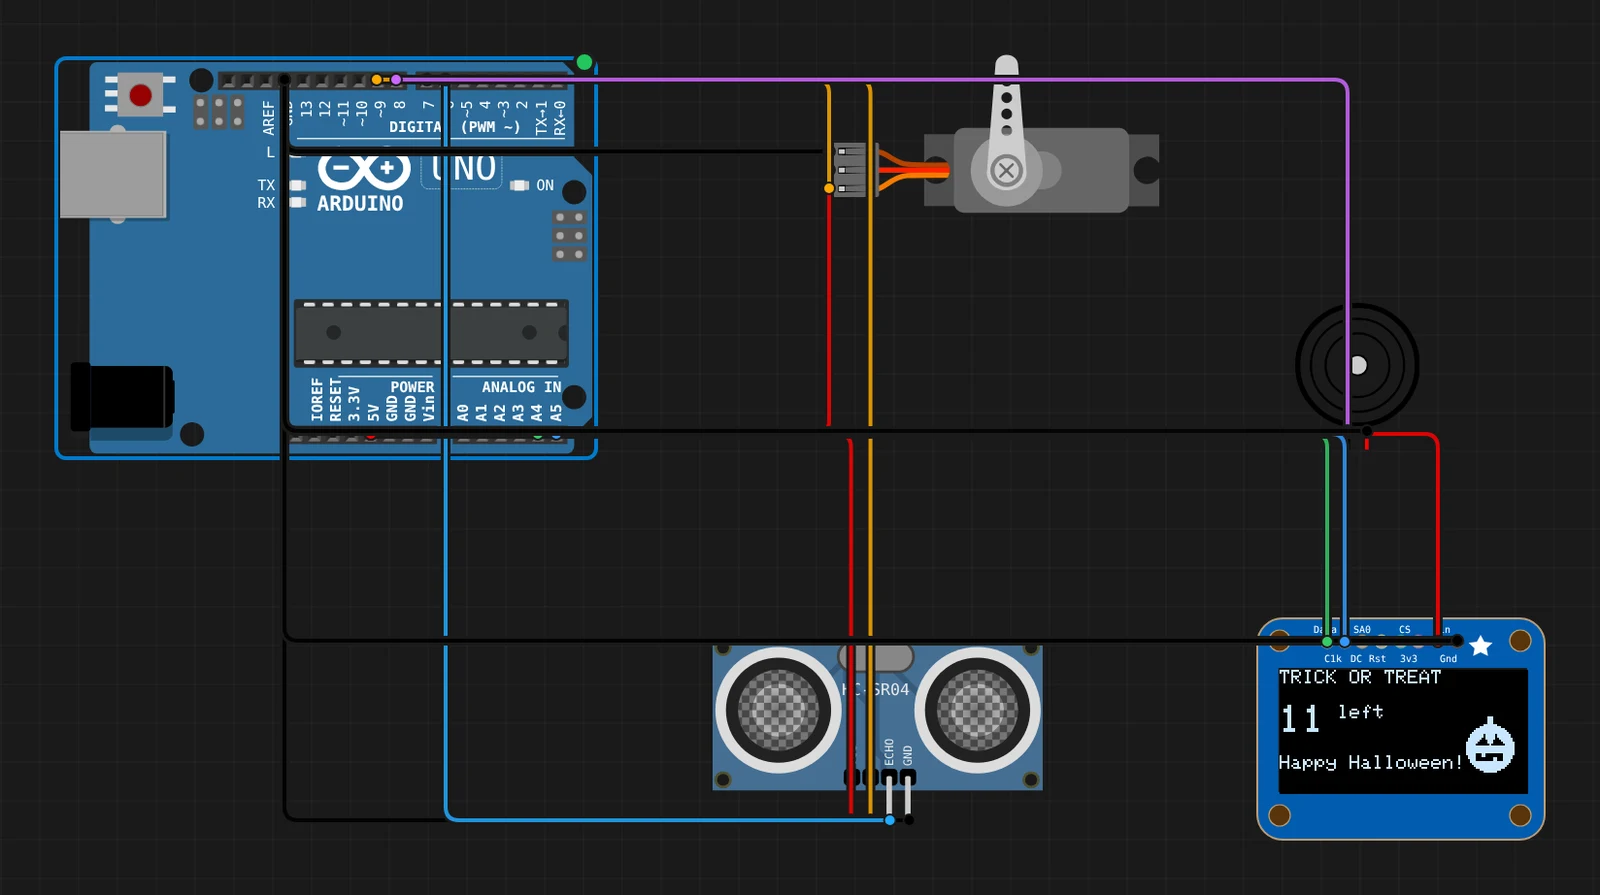
Click the HC-SR04 and drag its distance slider under 10 cm to hold out a hand. The sketch then waits until the hand is pulled back, so one wave is one candy and nobody empties the bowl by leaving a hand in place.
3. The eye that follows you (Seeed Round Display for XIAO)
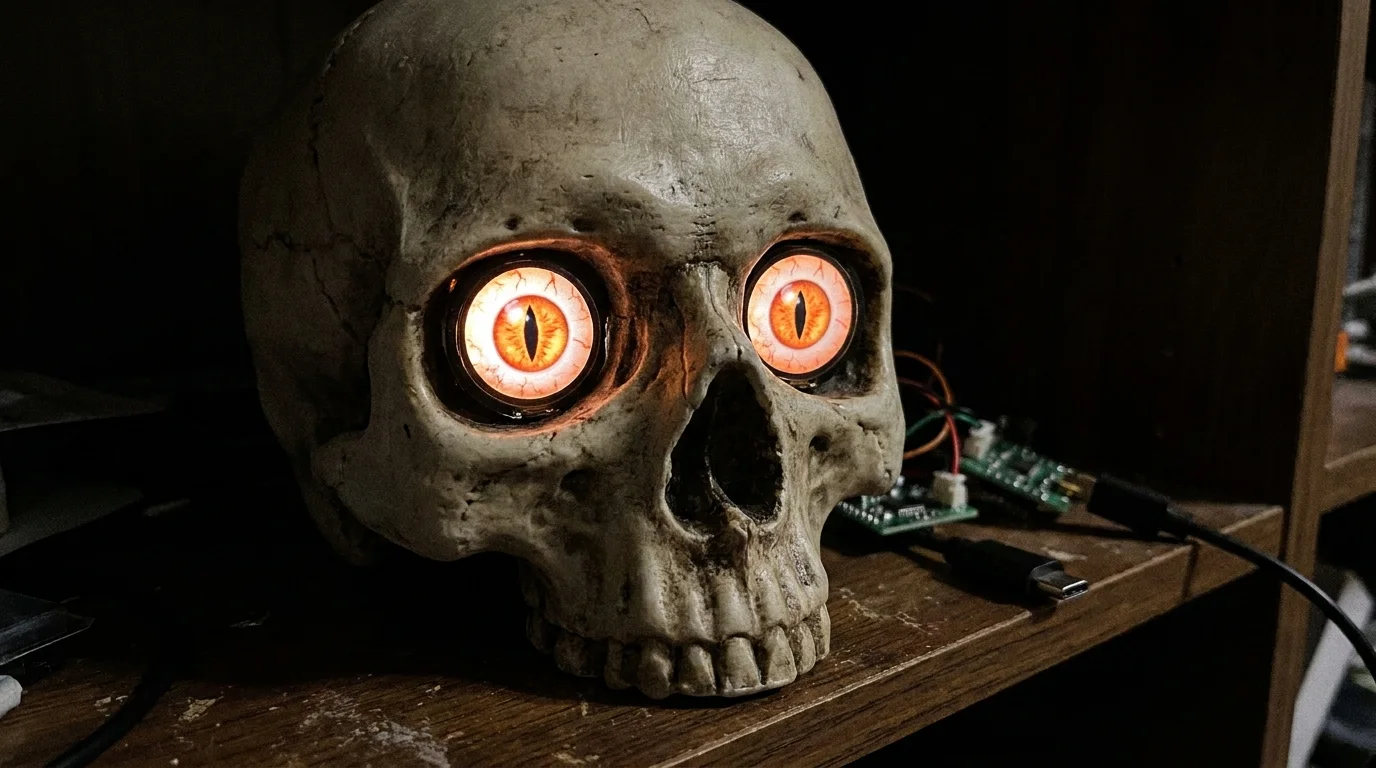
Illustration of a finished pair of eyes, generated with AI. The example in Velxio runs one display; a pair is two of them.
Eyes on round TFT displays were everywhere in last year’s element14 Halloween hackathon, from 3D-printed skulls to radar-triggered props. This one uses the Seeed Round Display for XIAO with a XIAO ESP32-S3 seated on its back. The 1.28 inch GC9A01 shows a bloodshot eyeball with an orange iris.
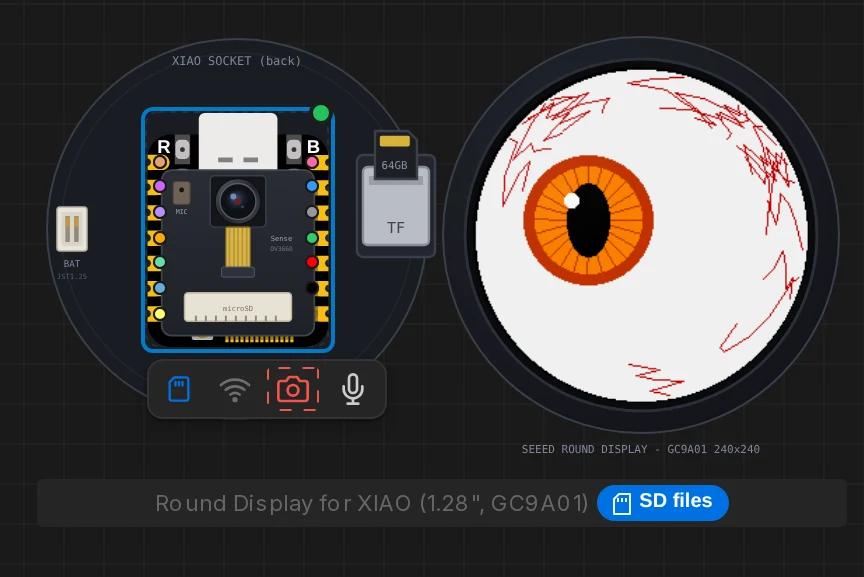
Press on the glass and the pupil chases your pointer. Keep pressing and it narrows into a cat’s slit. Let go and it goes back to glancing around the room on its own and blinking every few seconds.
The touch controller is the CHSC6X on the shield, read the same way Seeed’s own driver reads it: a falling edge on D7 says a finger is down and a five byte I2C read at 0x2E returns the position. Each frame is drawn into an off-screen sprite and pushed to the glass in one go, so the panel never shows a half-painted eye. Only the 174 pixel square the iris can reach is redrawn; the rim with its veins is painted once, and again after each blink:
static void drawEye() {
  frame.fillScreen(TFT_BLACK);
  drawSclera(frame, BX, BY);           // the part of the sclera inside the box
  ...                                  // iris, streaks, pupil, glint, eyelids
  frame.pushSprite(BX, BY);
}
The pins are the shield’s own, so the same sketch runs on the real stack.
For a pair of eyes, build two: a skull or a carved pumpkin takes two Round Displays in its sockets, each with its own XIAO running this sketch. They glance and blink independently, which reads as more alive than two eyes in perfect step.
4. Grove jack-o’-lantern that wakes at dusk (Seeed XIAO ESP32-S3)
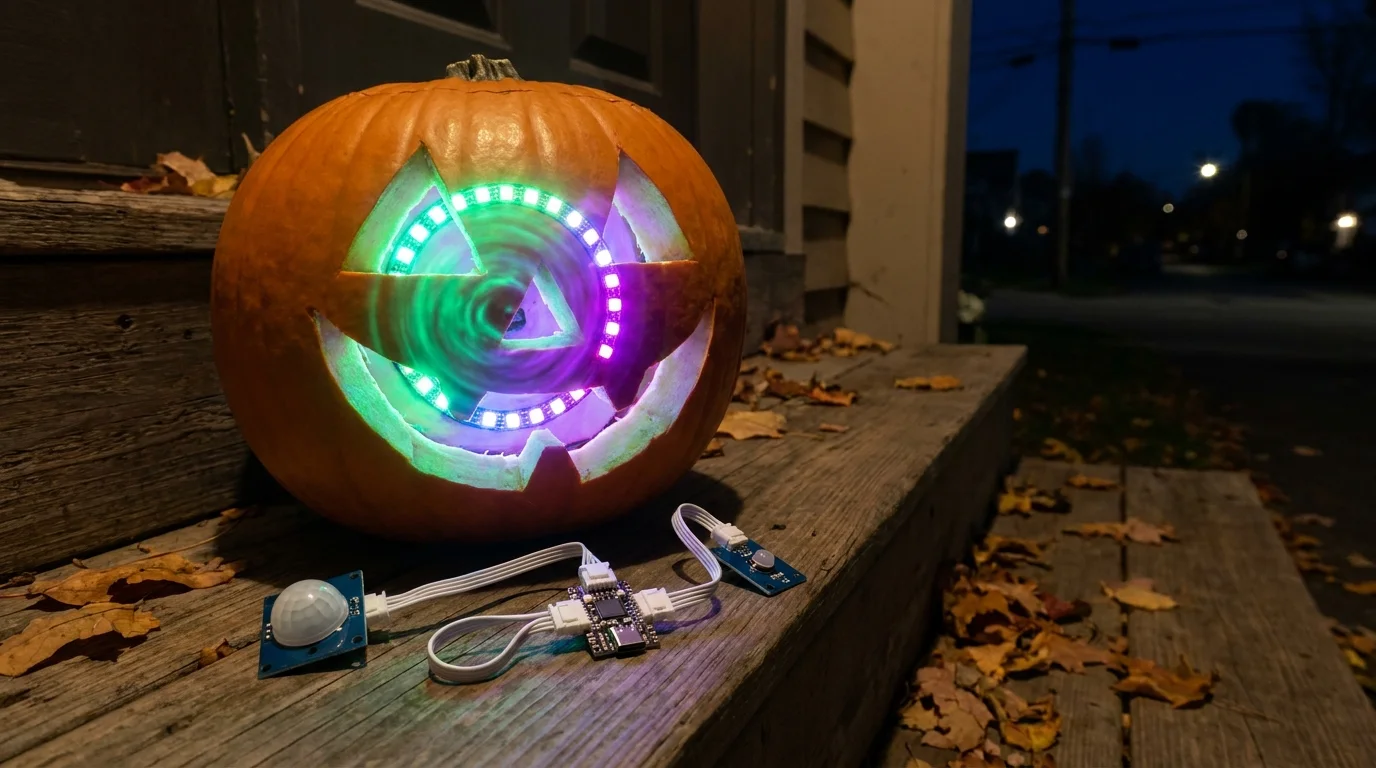
Illustration of the finished prop, generated with AI. The circuit below is the one that runs in Velxio.
Four Grove modules on a XIAO ESP32-S3 make an insert for a carved pumpkin. The Grove Light Sensor keeps the 42-LED Ultimate RGB LED Ring dark in daylight. Once it gets dark the ring flickers orange and yellow like a candle, each LED with its own flame. When the Grove PIR sees someone, the pumpkin is possessed: a green and purple vortex spins round the ring and the Grove Passive Buzzer plays a few bars of a spooky tune.
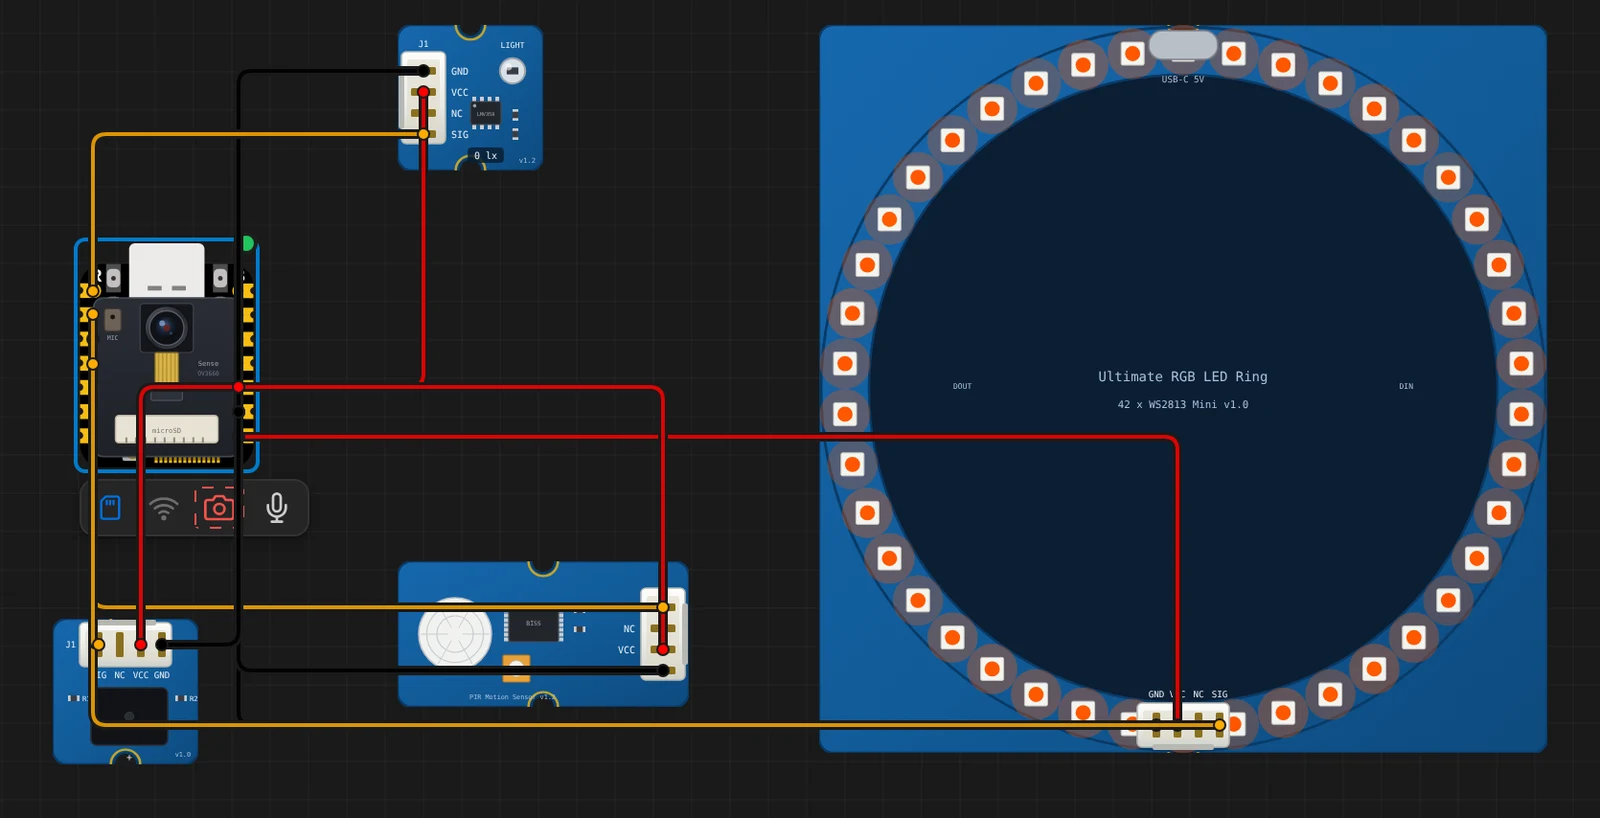
To try it, click the light sensor and drag its slider down to make it night, then click the PIR and trigger it.
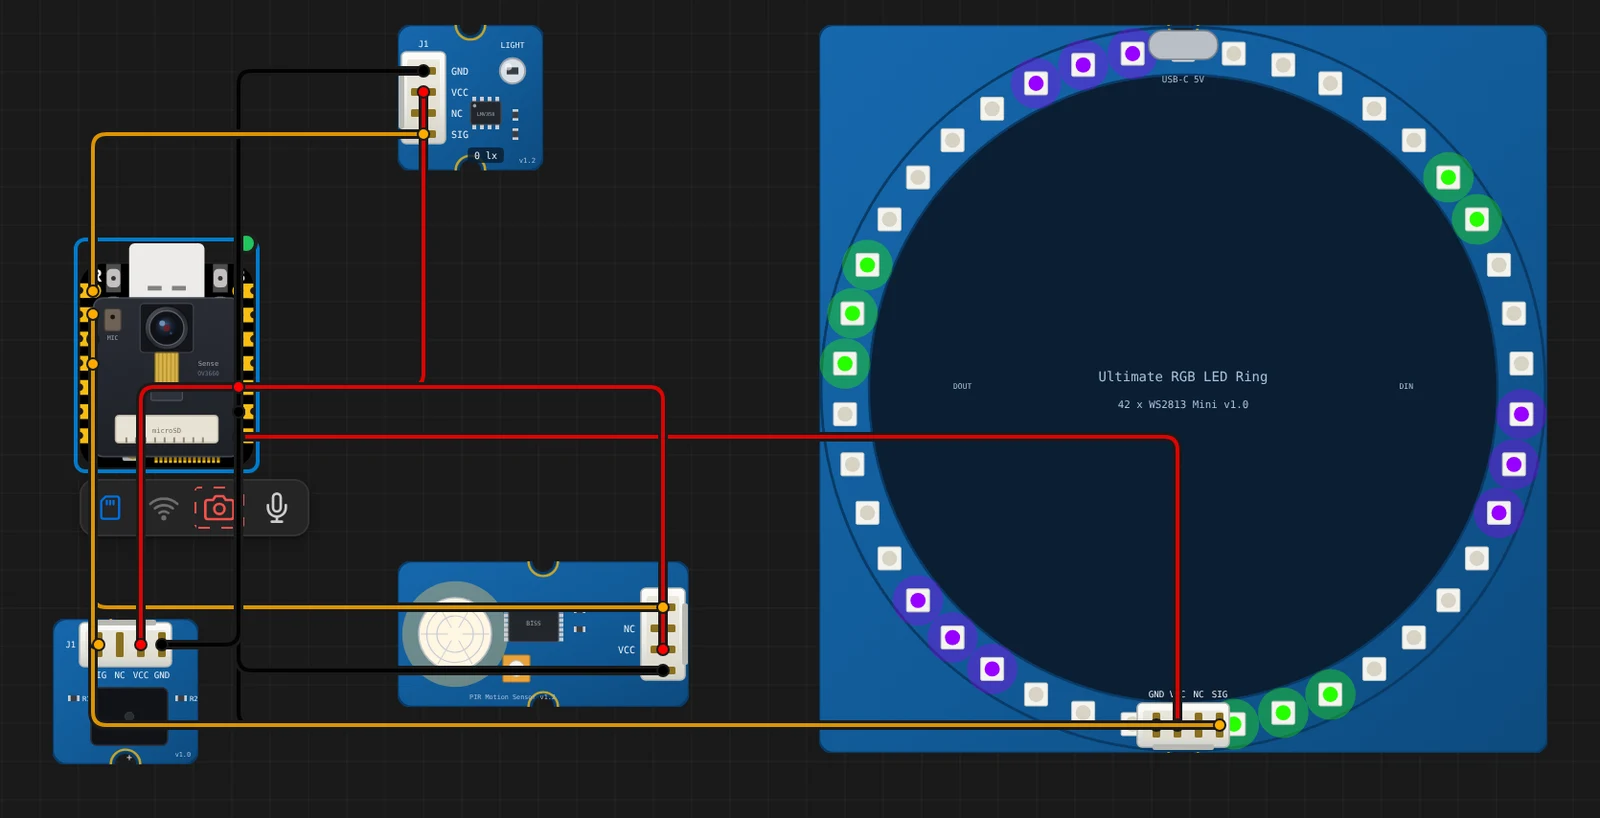
On real hardware, power the ring from the XIAO’s 5 V pad (the example is wired that way) and keep the brightness low: 42 WS2813 LEDs at full white draw far more than a USB port likes to give.
5. Haunted portrait (DFRobot C4001 mmWave radar)
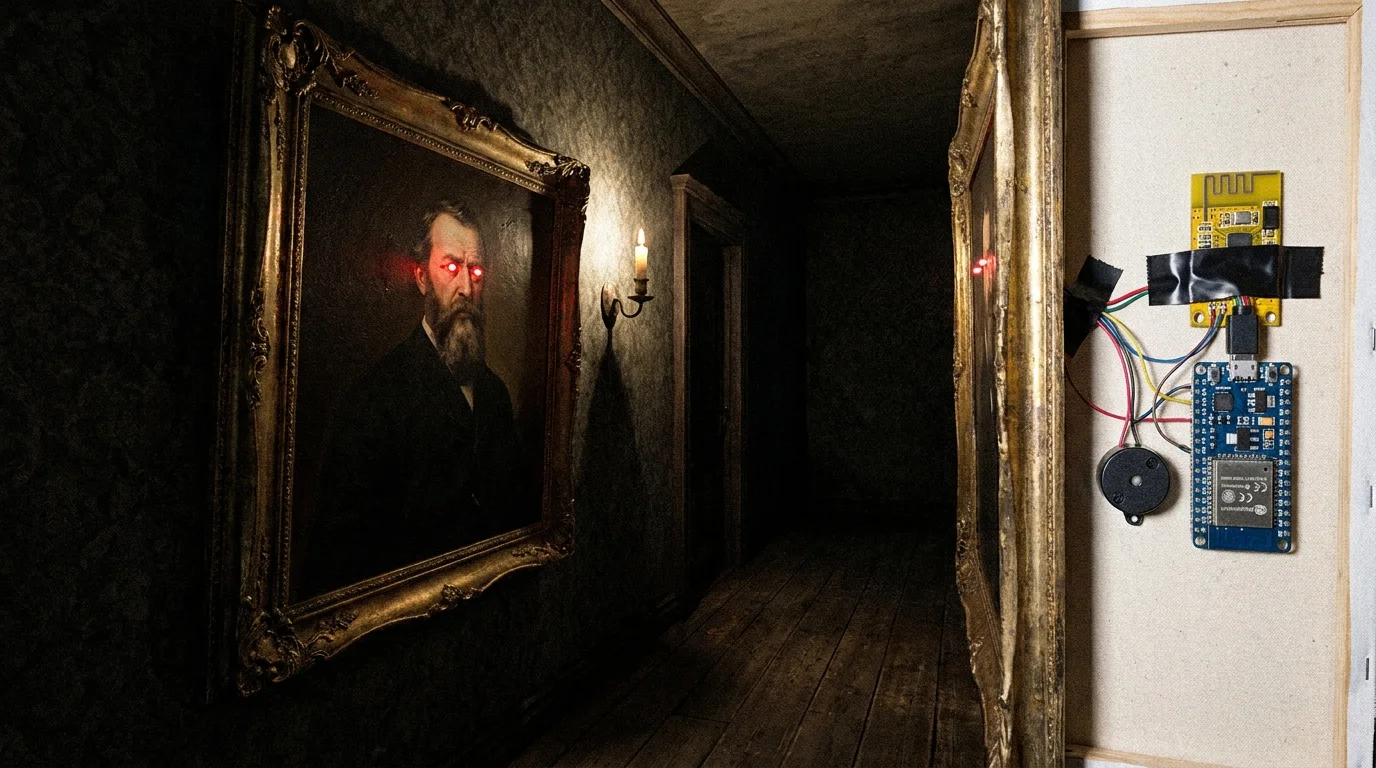
Illustration of the finished prop, generated with AI. The circuit below is the one that runs in Velxio.
The painting whose eyes follow the room is an old fairground trick, and a radar makes it a better one. The DFRobot C4001 (SEN0610) is a 24 GHz mmWave sensor that measures how far away a person is, and its signal goes straight through a canvas and a wooden frame. Hidden behind the picture, nothing gives it away.
The sketch puts the radar in speed mode, where it reports range as well as presence. The closer you stand, the brighter the portrait’s two LED eyes burn and the faster a heartbeat thumps on the buzzer, from one beat every 1.5 seconds at six metres to almost three a second up close. Step inside one metre and it shrieks.
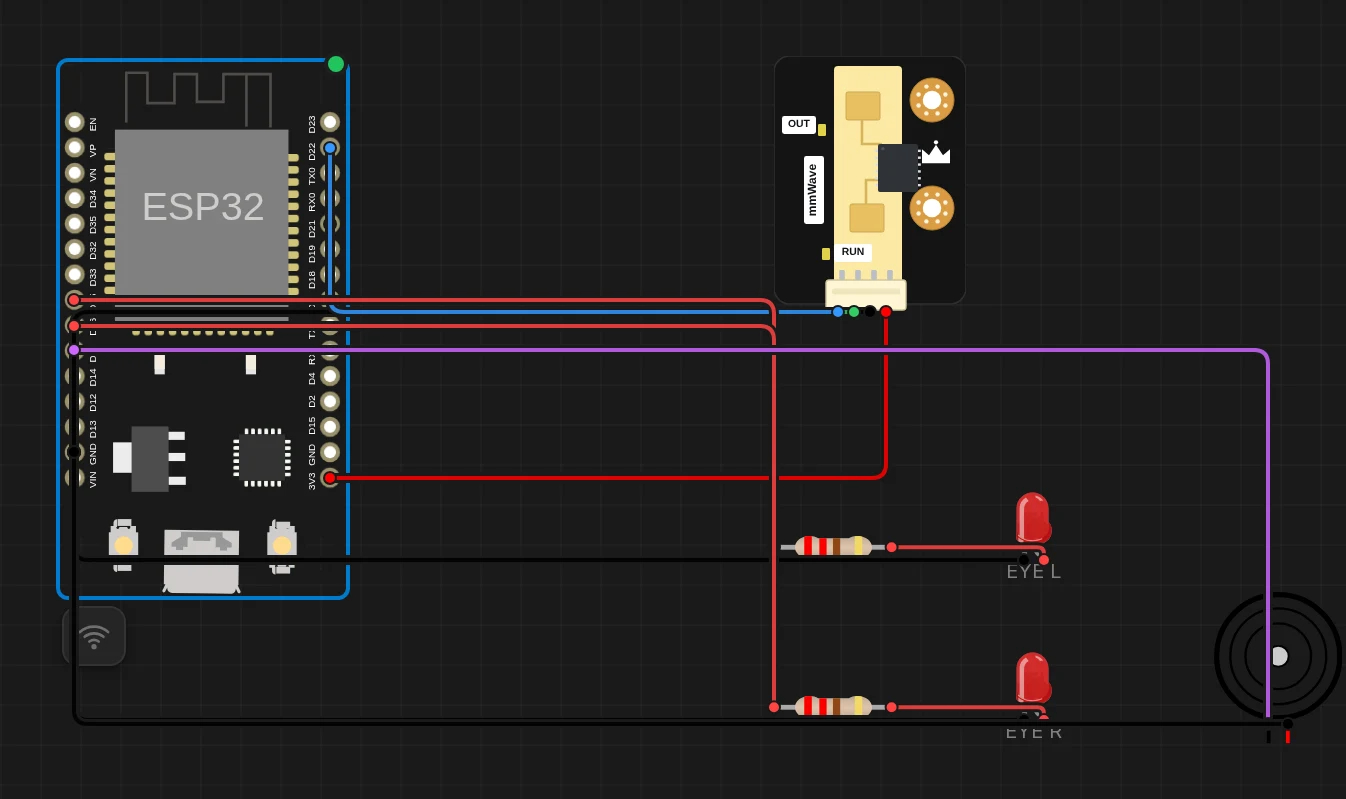
Click the radar and drag its distance slider to walk up to the painting.
// 6 m away: a dim glow. Right in front: full blaze.
float closeness = constrain((FAR_M - range) / (FAR_M - SHRIEK_M), 0.0f, 1.0f);
eyes(10 + (int)(closeness * 245));
6. Ghost detector (M5Stack Core)
A game more than a prop, and the only one with nothing to wire. The M5Stack Core Basic draws a needle meter that reads the “spectral field” of the room. The needle wanders on its own and every so often spikes into the red HAUNT zone; that is when a ghost floats onto the screen and the speaker starts to crackle.
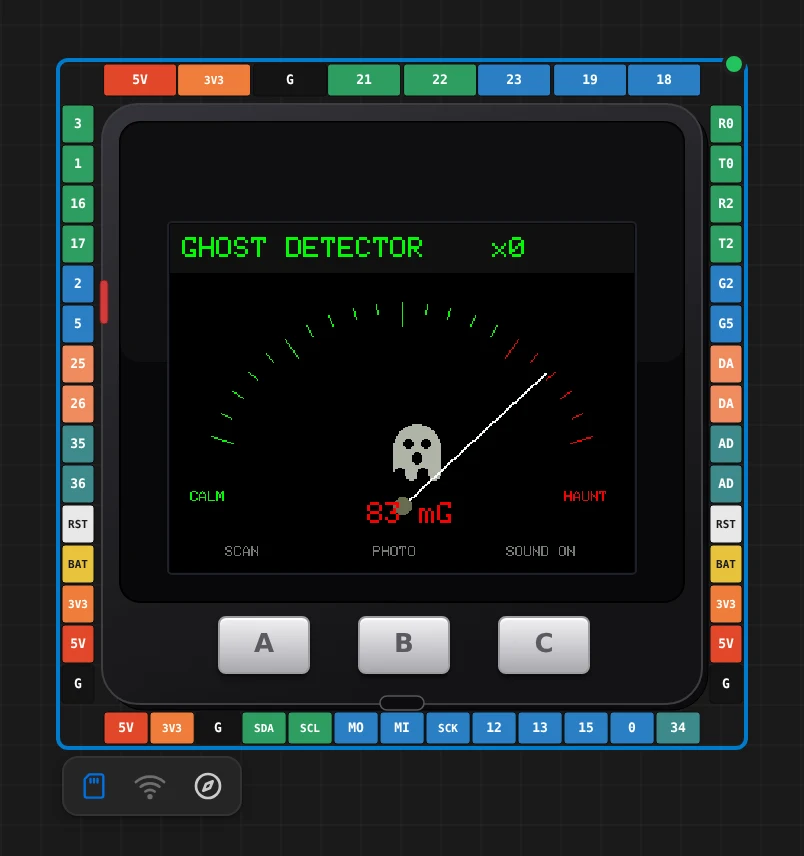
The three front buttons are the controls:
- A scans harder for three seconds, so ghosts show up more often.
- B takes a photo. Catch the ghost while it is on screen and the counter in the corner goes up.
- C turns the sound on and off.
The meter is drawn into an 8-bit M5Canvas sprite and pushed in one go, which
keeps the needle from flickering. A full-screen 16-bit sprite would not fit:
the Core Basic has no PSRAM.
7. LED-matrix pumpkin (Pimoroni Stellar Unicorn)
The last one is pure decoration. The Pimoroni Stellar Unicorn’s 16x16 RGB matrix becomes a ribbed jack-o’-lantern whose eyes, nose and jagged mouth glow from a candle inside. Press A for a lightning strike followed by a scrolling HAPPY HALLOWEEN, B to send a ghost drifting across the face, and LUX + and - to set the brightness.
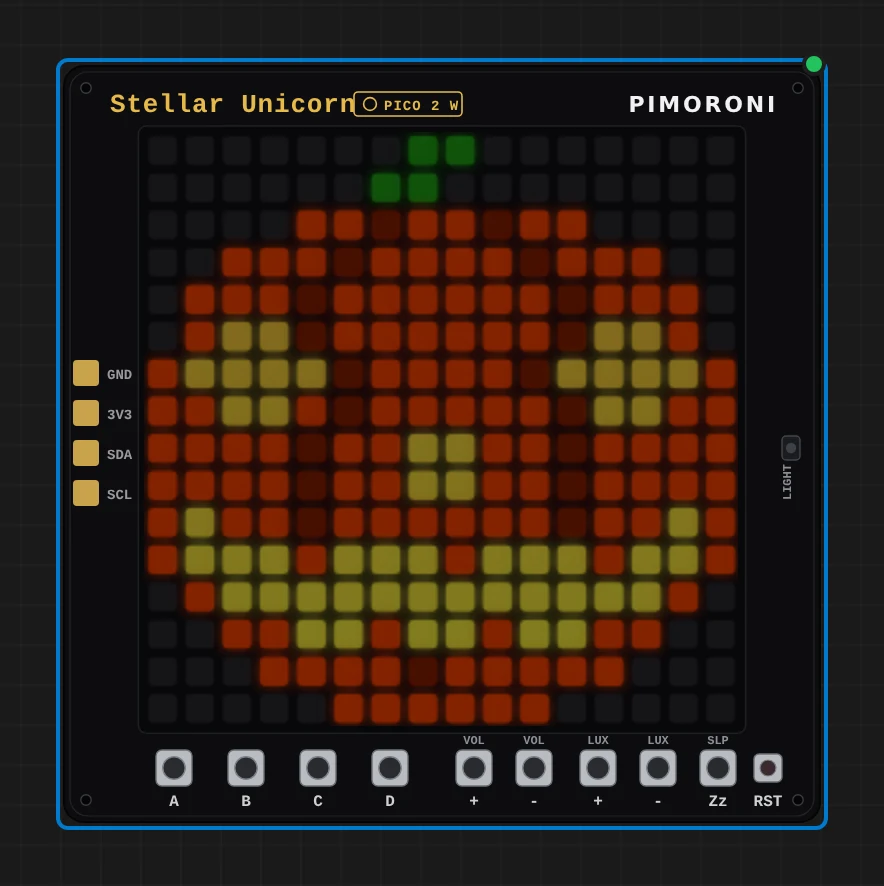
The face is a 16 by 16 grid of characters in the sketch, one letter per LED, so changing the expression is a matter of editing text.
Taking them to real hardware
The sketches are written against the same libraries and pins you would use on the bench, so moving from the simulator to a real build is mostly a matter of power and mechanics:
- Servos draw current spikes the Uno’s 5 V regulator does not like. For the skull and the dispenser, give the servo its own 5 V supply and join the grounds.
- A real PIR needs about a minute to settle after power-up and will fire on its own a few times during that minute.
- For the LED ring, power it from 5 V and keep
setBrightness()low unless you have a supply sized for it. - The C4001 sees through thin wood, cardboard and fabric but not through metal, so mind the hanging hardware of the frame.
Limits
- The radar, light sensor and ultrasonic sensor are driven by sliders. They give the sketch the numbers a real sensor would, not a physical scene.
- Sound plays through the browser. The buzzer parts follow the frequency the pin produces; they do not model the loudness or the timbre of a real piezo.
Open one, change it, and build the version that scares your own doorstep. Happy Halloween.