In February 2026 I got into an argument on Reddit. Someone claimed that the latest coding models wrote better code than any human developer, and cited the newest releases from OpenAI and Anthropic as proof. I did not agree. The models are very good at landing pages, CRUD back ends and the kind of demo that has a thousand copies on GitHub. I had doubts about what happens when the task needs spatial reasoning, careful floating-point arithmetic and an opinion about what feels good to play.
So I picked a project that barely exists on the internet and built it myself: a pseudo-3D racing game in the style of OutRun, running on an ESP32-S3 with an ILI9341 display. Along the way I asked the models to build the same thing. This article explains how the game works, in more depth than the shorter write-up I published on Medium, and ends with what the models got wrong. The full source is at github.com/davidmonterocrespo24/esp32s3-arcade-3d.
What the game does
The whole thing is about 2,500 lines of C++ in the Arduino framework, drawing through the TFT_eSPI library. It ships with:
- A road made of segments with curves, hills and dips, generated at random on every boot.
- A textured 3D player car loaded from an OBJ mesh: 428 vertices, 312 triangles, a 128 by 128 texture.
- Buildings on both sides of the road, one long tunnel with ceiling lights, and trees, bushes, rocks and lamp posts in the gaps.
- Six traffic cars with their own speed and lane.
- A day, sunset and night cycle with exponential fog toward the horizon.
- Physics with acceleration ramps, friction, hill gravity and lateral drift in curves, plus collisions with traffic, walls and roadside objects.
- A HUD with a round speedometer, lap counter and current and best lap times.
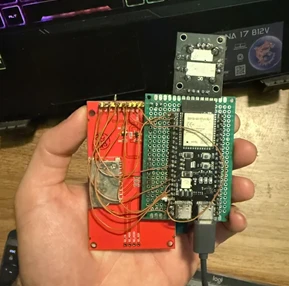
The hardware is deliberately ordinary:
| Component | Details |
|---|---|
| SoC | ESP32-S3, 240 MHz dual-core, with PSRAM |
| Display | ILI9341 TFT, 320 by 240 pixels, 16-bit RGB565, over SPI |
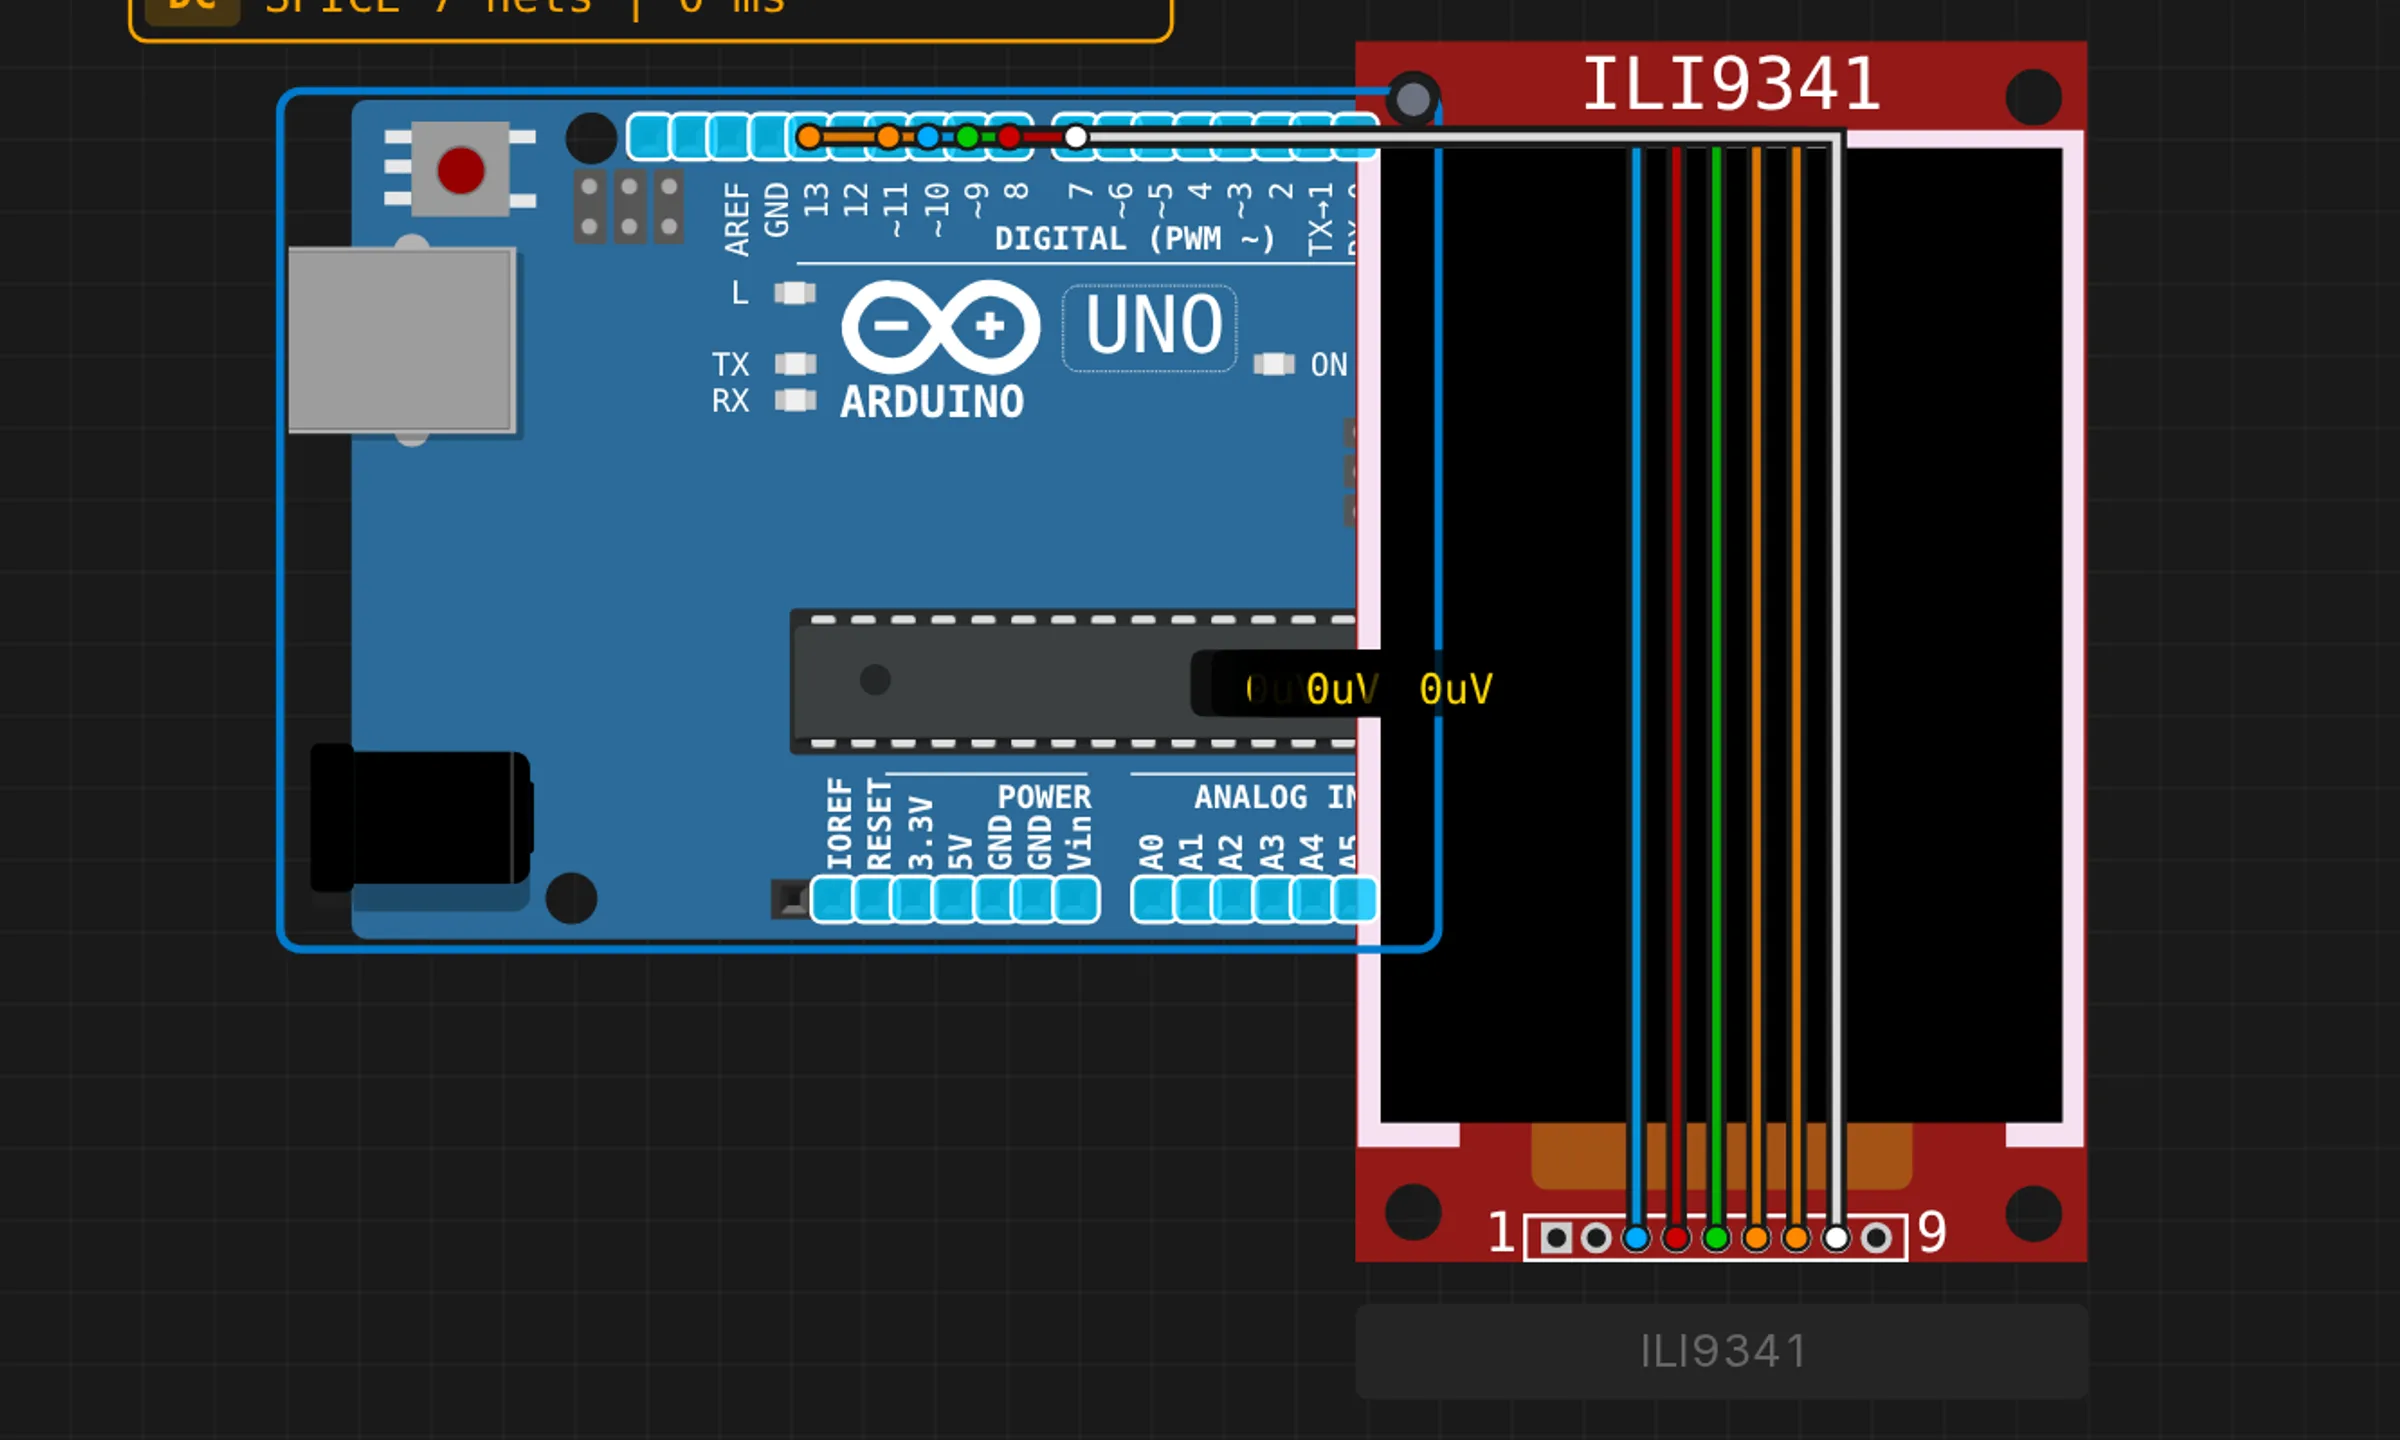
| Display pins | SCK 12, MOSI 11, MISO 13, CS 10, DC 9, RST 8 |
| Backlight | GPIO 39 |
| Buttons | GPIO 17 (left) and GPIO 16 (right), with internal pull-ups |
Why there is no Z-buffer
The first answer both ChatGPT and Claude gave me was that the project was not feasible on this hardware, because a 3D renderer needs a depth buffer and the microcontroller has no room for one. The arithmetic is worth doing, because it shows what the real constraint is.
A 320 by 240 frame in RGB565 is 153,600 bytes. A 16-bit depth buffer of the same size is another 153,600 bytes. The ESP32-S3 has 512 KB of internal SRAM, of which a good part is taken by the Arduino core, the display driver and the heap, so two full-screen buffers do not fit comfortably in internal memory. With PSRAM they do fit. The memory argument is weak.
The stronger argument is per-pixel cost. A depth buffer means a read, a compare and a conditional write for every pixel of every triangle, in software, on a core that also has to fill 76,800 pixels per frame and push them out over SPI. At 240 MHz that budget is thin.
Arcade racers of the 1980s had neither the memory nor the fill rate, and they solved it with ordering instead of depth testing: draw the far things first and let the near things paint over them. That is the painter’s algorithm, and it works because a road is a very well-behaved scene. The segments are already sorted by distance, and everything else (trees, buildings, traffic) is attached to a segment. The only object that needs real 3D is the player’s car, and it sits at a fixed distance in front of the camera, so it can be sorted on its own.
The road: segments and projection
The road is an array of 200 segments, each 200 world units long. A segment stores its curvature, its elevation, an optional roadside sprite, a tunnel flag and the height and colour of a building on each side:
struct Segment {
  float curve;              // Segment curvature
  float y;                  // Height (elevation)
  int8_t spriteType;        // Sprite type (-1 = none)
  float  spriteOffset;      // Lateral sprite offset
  bool   tunnel;            // true = inside tunnel
  int    buildL, buildR;    // Left/Right building height (0 = no building)
  uint16_t colorL, colorR;  // Building facade color
};
The world scale comes from the road width: ROAD_W is 2000 units for
half the road, which I take to be about 10.5 m, so one unit is about
5.25 mm. Every other constant in config.h is expressed in those units.
The core technique follows Jake Gordon’s
JavaScript racer articles,
which are the clearest explanation of pseudo-3D roads I know. The camera
sits CAM_HEIGHT units above the road. The field of view defines a
camera depth:
float fovRad = FOV_DEG * PI / 180.0;
cameraDepth  = 1.0 / tanf(fovRad / 2.0);
playerZdist  = CAM_HEIGHT * cameraDepth;
Projecting a segment edge is then one division and two multiplications.
camZ1 is the distance from the camera to the near edge of segment n,
and sc1 is the scale at that distance:
float sc1   = cameraDepth / camZ1;
float cyp1  = p1Y - camY;                       // height relative to the camera
float cxp1  = playerX * ROAD_W - curveX;        // lateral offset incl. the curve
int16_t sy1 = SCR_CY - (int)(sc1 * cyp1 * SCR_CY);
int16_t sx1 = SCR_CX + (int)(sc1 * (-cxp1) * SCR_CX);
int16_t sw1 = (int)(sc1 * ROAD_W * SCR_CX);
Curves are the classic trick: a segment’s curve is not an angle, it is
a per-segment change in horizontal offset. As the loop walks away from
the camera it accumulates curveDX += seg.curve and curveX += curveDX,
so the offset grows quadratically with distance and the road bends
smoothly. Hills are simpler still: each segment has its own y, and the
projection uses the height difference to the camera, so a rising road
climbs the screen and a dip disappears below the horizon.
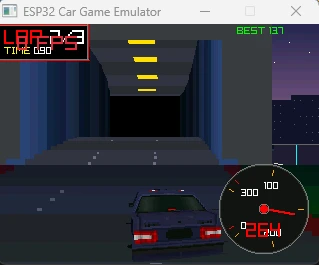
The interesting detail is that drawRoad() makes two passes over the
segments, in opposite directions.
- Front to back, projecting. The first loop walks from the nearest
segment outward, projects each edge into
rCache[n], and records inrClip[n]the lowest screen row that is still visible at that distance. As the loop advances,maxyonly ever moves up: a segment behind a hill crest projects below the crest and is clipped away. This is how hills occlude what is behind them without any depth compare. - Back to front, drawing. The second loop walks from the far end
toward the camera and draws each segment’s grass, rumble strips, road
and lane lines as horizontal bands between
rCache[n]andrCache[n-1], clipped byrClip. Near the camera a segment can be many rows tall, so it is subdivided into up to three bands with the width interpolated between the two edges, which keeps curves from looking like stacked trapezoids.
Buildings and the tunnel share the loop
An early version drew the road in one loop and the buildings in another. It looked right on flat ground and fell apart on hills: a building that should be hidden behind a crest was painted on top of it, because the second loop had no idea what the first one had already drawn.
The fix was to draw everything that belongs to a segment inside the same back-to-front loop. For each segment, in order: the tunnel walls and ceiling if the segment is inside the tunnel, the buildings if it is outside, then the road surface. A building is a pair of quads (front face and side face) built from the projected road edges of the segment and the one before it:
void drawQuad(int x1, int y1, int x2, int y2, int x3, int y3, int x4, int y4, uint16_t c) {
  spr.fillTriangle(x1, y1, x2, y2, x3, y3, c);
  spr.fillTriangle(x1, y1, x3, y3, x4, y4, c);
}
The tunnel is the same idea with the quads turned inward: a ceiling quad at a fixed height above the road, two wall quads, a yellow light every four segments and a grey portal drawn on the first segment. Because all of it is emitted in painter’s order, a tunnel entrance halfway up a hill looks correct with no special cases.
Roadside sprites and the traffic cars go in a third, short loop after the
road is complete. They are drawn as flat shapes scaled by the segment’s
projection scale and clipped to rClip, so a tree behind a hill is cut
off at the crest exactly like the road is.
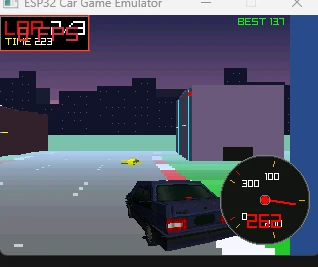
The player car is real 3D
I did not want a sprite for the player. The car is an OBJ mesh converted offline into a C header by a small Python script, so nothing is parsed at runtime:
python assets/obj_to_header.py assets/Car2.obj > car2_mesh.h
python assets/png_to_rgb565.py assets/car2.png > car2_texture.h
The header holds 428 vertices with position and texture coordinates, and
312 triangles as an index list. The 128 by 128 texture is 32 KB of RGB565
in flash, read with pgm_read_word() so it never touches RAM.
Every frame the mesh goes through a small fixed pipeline in
render_player.cpp:
- Transform. Each vertex is rotated around the vertical axis by an angle derived from the car’s lateral position (the car visibly turns into the curve), then pitched by the road slope, averaged over the next six segments and smoothed over time so the car tilts on hills without jitter.
- Project.
x = centerX + rx * fov / z, with a fixed camera distance and a focal length of 130 pixels. Vertices behind the camera are flagged and their triangles skipped. - Sort. The average depth of each triangle is computed and the 312 triangles are sorted far to near. An insertion sort is enough at this size and is nearly free when the order barely changes between frames.
- Cull and light. Triangles facing away are dropped using the sign of the 2D cross product. The face normal is computed in object space and dotted with a fixed light from above and slightly in front, giving a brightness between 0.35 and 1.0.
- Rasterize. Each triangle is drawn by a scanline rasterizer with affine texture mapping.
The rasterizer is the part I spent the most time on. It sorts the three vertices by screen Y, walks the rows between the top and bottom, and for each row interpolates the left and right X and the texture coordinates along the two active edges. Then it steps across the row, samples the texture, applies the lighting and writes one pixel:
for (int x = x0; x <= x1; x++) {
  float t = (x - xL) * dx;
  float u = uL + t * (uR - uL);
  float v = vL + t * (vR - vL);

  int tx = (int)(u * (CAR2_TEX_W - 1));
  int ty = (int)((1.0f - v) * (CAR2_TEX_H - 1));  // OBJ V runs bottom-up
  tx = max(0, min(tx, CAR2_TEX_W - 1));
  ty = max(0, min(ty, CAR2_TEX_H - 1));

  uint16_t texel = pgm_read_word(&car2_texture[ty * CAR2_TEX_W + tx]);
  if (light < 0.99f) {
    uint8_t r = ((texel >> 11) & 0x1F) * light;
    uint8_t g = ((texel >>  5) & 0x3F) * light;
    uint8_t b = ( texel        & 0x1F) * light;
    texel = (r << 11) | (g << 5) | b;
  }
  spr.drawPixel(x, y, texel);
}
Affine mapping interpolates u and v linearly in screen space, which
is not perspective-correct. On a large wall it produces the wobble that
PlayStation games were famous for. On a car that occupies about a fifth of
the screen, always at the same distance, the error is below a pixel and
the division per pixel that a correct mapping would need is not worth
paying. The renderer also refuses any scanline wider than 160 pixels and
any triangle with a vertex more than 20 pixels off screen. Both guards
exist because of real bugs: a single mis-sorted or clipped vertex turns
into a streak across the whole frame, and it is far cheaper to drop the
triangle than to clip it properly.
Under the car sits a dark ellipse drawn as a stack of horizontal lines. It shifts with the car’s lateral position and is the single cheapest thing in the project with the largest effect on how grounded the car looks.
Sky, parallax and the time of day
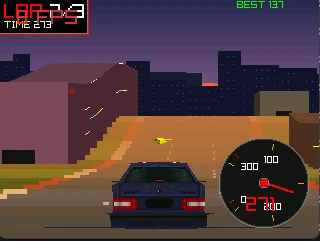
The sky is not drawn every frame. At boot, initBackground() builds a
640 by 120 sprite in PSRAM (twice the screen width, the top half of the
screen tall) with a vertical gradient, a sun, and two layers of a
procedural skyline with lit windows. Every frame the main loop scrolls it
by an amount proportional to the current curve and speed, and blits it
twice so the wrap-around is seamless:
int bgX = (int)skyOffset % (SCR_W * 2);
bgSpr.pushToSprite(&spr, -bgX, 0);
bgSpr.pushToSprite(&spr, (SCR_W * 2) - bgX, 0);
This is the effect Horizon Chase uses: the horizon slides sideways as you turn, which sells the curve far more than the road geometry alone.
The palette lives in colors.cpp as three sets of RGB565 colours for day,
sunset and night: sky, light and dark grass, light and dark road, rumble
strips, lane markings and fog. The game switches to the next set every
180,000 world units of travel, which at top speed is about fourteen
seconds. Fog is exponential in distance and blended per segment:
float expFog(float d, float density) {
  return 1.0f - clampF(1.0f / expf(d * d * density), 0, 1);
}
lerpCol() blends two RGB565 values channel by channel, which is enough
to fade the road and grass into the fog colour without ever converting to
24-bit.
Physics: what makes it feel like a car
Graphics get a racer noticed. Physics decide whether anyone plays it for
more than a minute. All of the tuning lives in config.h:
#define SPEED_MULTIPLIER   65.0f   // maxSpeed = SEG_LEN * SPEED_MULTIPLIER (~246 km/h)
#define ACCEL_TARGET       0.9f    // targetAccel = maxSpeed * ACCEL_TARGET
#define ACCEL_RAMP         180.0f  // How fast acceleration ramps up (u/s^2)
#define FRICTION           0.996f  // Friction per frame (braking ~3.3s from max)
#define GRAVITY_FACTOR     1600.0f // Effect of slopes on acceleration
#define CENTRIFUGAL        0.18f   // Centrifugal force in curves
#define CURVE_FORCE        3.0f    // Lateral force multiplier in curves
#define LATERAL_FRICTION   0.90f   // Lateral velocity damping per frame
The update in physics.cpp does four things in order. Slope is read from
the height difference between the current segment and the previous one
and turned into an acceleration, so climbs bleed speed and descents add
it. Friction is applied as a multiplicative decay. The acceleration, which
ramps up over time rather than jumping to its target, is integrated into
speed. Then the curve pushes the car sideways:
float curveForce = segments[pSeg].curve * centrifugal * spPct;
velocityX += curveForce * dt * CURVE_FORCE;   // lateral velocity builds up
velocityX *= LATERAL_FRICTION;                // and decays every frame
playerX   -= velocityX * dt;
The lateral velocity is what gives the drift. A car entering a curve does not slide immediately; the force accumulates, the slide builds, and when the curve ends the damping brings the car back. The angle of the drift is then computed from the ratio of lateral to forward speed and used only for display.
Collisions are handled by distance along the track plus overlap in the lateral axis. Hitting a slower traffic car from behind drops you to seventy percent of its speed; touching a tunnel wall, a tree or leaving the road entirely scrubs more speed, and any of them above a threshold triggers the two-second crash state.
The build in the repository runs as a demo: an autopilot reads the
upcoming curve and counter-steers into it, and the throttle is always
down. The two buttons are declared and pulled up in setup(), and the PC
emulator maps the arrow keys onto them, so manual steering is a few lines
in handleInput().
None of these constants came from a formula. I sketched the perspective on paper, built the speed curves in a spreadsheet, and then changed one number at a time until the car felt right. That loop only worked because each iteration took seconds, which brings me to the emulator.
Developing on a PC with Raylib
Flashing an ESP32-S3 takes long enough that tuning a constant by feel is
painful. So the same source compiles on Windows against
Raylib, with the Arduino and TFT_eSPI calls
replaced by a thin shim in the emulator/ folder:
car_game_wrapper.cppsimply does#include "../car_game.ino", so the sketch becomes an ordinary C++ translation unit with no edits.Arduino.handArduino.cppprovidemillis(),delay(),random(), aSerialthat prints to stdout, and adigitalRead()that returns the state of the arrow keys for the two button pins.TFT_eSPI.cppimplementsTFT_eSpriteon top of a Raylib render texture.fillRect,fillTriangle,drawPixeland the rest become Raylib draw calls;pushSprite()blits the texture to the window.
One example of the kind of thing the shim has to get right:
void TFT_eSprite::fillTriangle(int32_t x0, int32_t y0, int32_t x1, int32_t y1,
                               int32_t x2, int32_t y2, uint16_t color) {
  BeginTextureMode(sd->texture);
  // Draw twice so both winding orders show; Raylib culls one of them
  DrawTriangle({x0, y0}, {x1, y1}, {x2, y2}, r565(color));
  DrawTriangle({x0, y0}, {x2, y2}, {x1, y1}, r565(color));
  EndTextureMode();
}
TFT_eSPI does not care about winding order, Raylib does, and the road code never promises one. Drawing each one twice costs nothing on a GPU and made the emulator pixel-faithful to the board.
With this in place the loop was edit, make, run, in a few seconds. The
screenshots in this article are from the emulator; the animation at the
top is the board.
Memory and frame budget on the board
Where the bytes go:
| Buffer | Size | Where |
|---|---|---|
| Frame sprite, 320 by 240 by 16-bit | 153,600 B | PSRAM |
| Sky and skyline sprite, 640 by 120 by 16-bit | 153,600 B | PSRAM |
| Car texture, 128 by 128 by 16-bit | 32,768 B | Flash |
| Car mesh, 428 vertices and 312 triangles | about 10 KB | Flash |
| Track, 200 segments | about 6 KB | Internal SRAM |
| Projection caches and per-frame arrays | a few KB | Internal SRAM |
The two sprites are created with spr.setAttribute(PSRAM_ENABLE, true)
before createSprite(). That single line is the difference between a
game that runs and one that fails to allocate. The 8 MB of PSRAM on the
module is mostly unused; what matters is that the two full-width buffers
do not compete with the Arduino core for internal memory.
The frame is composed entirely in the sprite and pushed to the panel once
per loop with spr.pushSprite(0, 0). That is what removes tearing, and it
is also the ceiling on frame rate: 153,600 bytes over SPI at 40 MHz takes
about 31 ms on its own, before any drawing. On the board the game settles
around 30 frames per second, which is exactly what that arithmetic
predicts. Raising the SPI clock in TFT_eSPI’s User_Setup.h is the first
place to look if you want more.
Where the AI models fell short
In parallel with the hand-written version, I asked the coding models available in February 2026 to build the same game from a description. This is what happened, as fairly as I can put it:
- ChatGPT produced code that did not compile, and once fixed by hand its perspective calculations were far off. Its consistent advice was to add a Z-buffer.
- Claude produced the best file structure and the most readable code, and then broke the rendering pipeline. It did not keep the back-to-front order across the road, tunnel and buildings, and it introduced subtle bugs in the floating-point math.
- Gemini 3 Pro got closest on the projection math, and then had no opinion at all about the rest. The colours looked wrong, the physics felt floaty, and when its own output had rendering artifacts it could not find them.
I do not think any of this is surprising. The three things the project needed most are the three things a language model has the least of:
- Ordering in space. Knowing what is in front of what, on a hill, inside a tunnel, is a spatial fact, not a textual one.
- Numerical care. The OBJ file is Y-up and the screen is Y-down, the texture’s V axis runs bottom to top, and the curve offset is accumulated in floating point across forty segments every frame. Each of those is one sign or one rounding away from a road that drifts or a car drawn inside out.
- Taste. Whether 0.18 or 0.25 is the right centrifugal constant cannot be derived. It has to be driven.
I did use AI on this project, and it was useful for exactly the things it is good at: scaffolding the module layout, writing the OBJ and PNG converters, and refactoring repetitive drawing code once the design was settled. Every constant, every projection and every ordering decision was made by hand. The model was a tool, not the architect. That was true in February 2026 and it may not be true forever; if you get a model to produce a playable version of this from the description alone, I would genuinely like to see it.
Build it yourself
The repository is github.com/davidmonterocrespo24/esp32s3-arcade-3d.
On the board:
- Wire an ILI9341 to the ESP32-S3 on the pins in the hardware table above, and the two push buttons between GPIO 17, GPIO 16 and ground.
- Install the TFT_eSPI library and set the same pins and the SPI clock in
its
User_Setup.h. - Open
car_game.inoin the Arduino IDE, select ESP32S3 Dev Module, enable PSRAM in the board options, and upload.
On a PC (Windows, MinGW and Raylib installed):
cd emulator/
make
./car_game_emu.exe
The same wiring is described in the repository’s diagram.json, and both
the ESP32-S3 DevKit and the ILI9341 exist in Velxio’s part catalog if you
want to lay the circuit out without a soldering iron. I have not yet tried
running the full game inside the emulated board; TFT_eSPI’s pin setup and
the PSRAM sprite make it a more interesting test than a blink sketch, and
it is on my list.
If you build it, change the track generator, or manage to get a model to write it, open an issue on the repository. I read all of them.